검색결과 리스트
프로그래밍 에 해당되는 글 428건
- 2024.09.19 bytes -> str
- 2024.09.18 React Native에서 핸드폰 화면 크기
- 2024.09.06 axios create 객체 생성
- 2024.09.04 React Native에서 절대 경로 설정
- 2024.08.26 django ubuntu nginx gunicorn 배포
- 2024.08.14 Material Design Break point
- 2024.08.13 vue 기본 코드
- 2024.08.11 react native reanimated 설정
- 2024.07.23 Vue List Rendering
- 2024.07.23 Vue 기본 태그
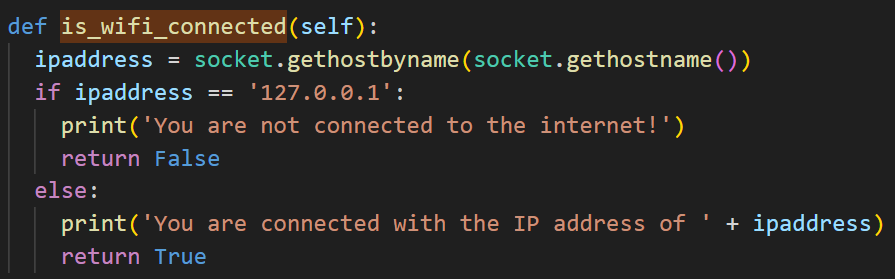
- 2024.07.19 인터넷 연결 확인 코드
- 2024.07.18 리액트 네이티브 스플래시 이미지
- 2024.07.11 PySide6 기본 구조
- 2024.07.10 pyside6 설치 후 Qt Designer 실행
- 2024.07.02 redux toolkit 사용 방법
2024. 9. 19. 16:12
bytes -> str
text = by.decode('utf-8')
str -> bytes
bytedata = text.encode('utf-8')
2024. 9. 18. 16:33
import { useWindowDimensions } from 'react-native';
const width = useWindwoDemensions().width;
const height = useWindowDimensions().height;
const { width, height } = useWindowDimensions();
2024. 9. 6. 11:22


2024. 9. 4. 20:17
1. babel-plugin-module-resolver 설치
npm i babel-plugin-module-resolver
2. babel.config.js에서 plugins 수정

3. tsconfig.json 에 compilerOptions 수정

2024. 8. 26. 21:24
1. 가상환경 생성
virtualenv venv
source venv/bin/activate
2. django project 생성 후 실행
django-admin startproject conf .
python manage.py migrate
python manage.py runserver 0.0.0.0:8000
3. gunicorn 설치 및 실행
pip install gunicorn
sudo apt install gunicorn
gunicorn --bind 0.0.0.0:8000 conf.wsgi
4. gunicorn.socket 작성
sudo vim /etc/systemd/system/gunicorn.socket
/run/gunicorn.sock 생성하고 실행한다는 코드

5. gunicorn.service 작성
sudo vim /etc/systemd/system/gunicorn.service
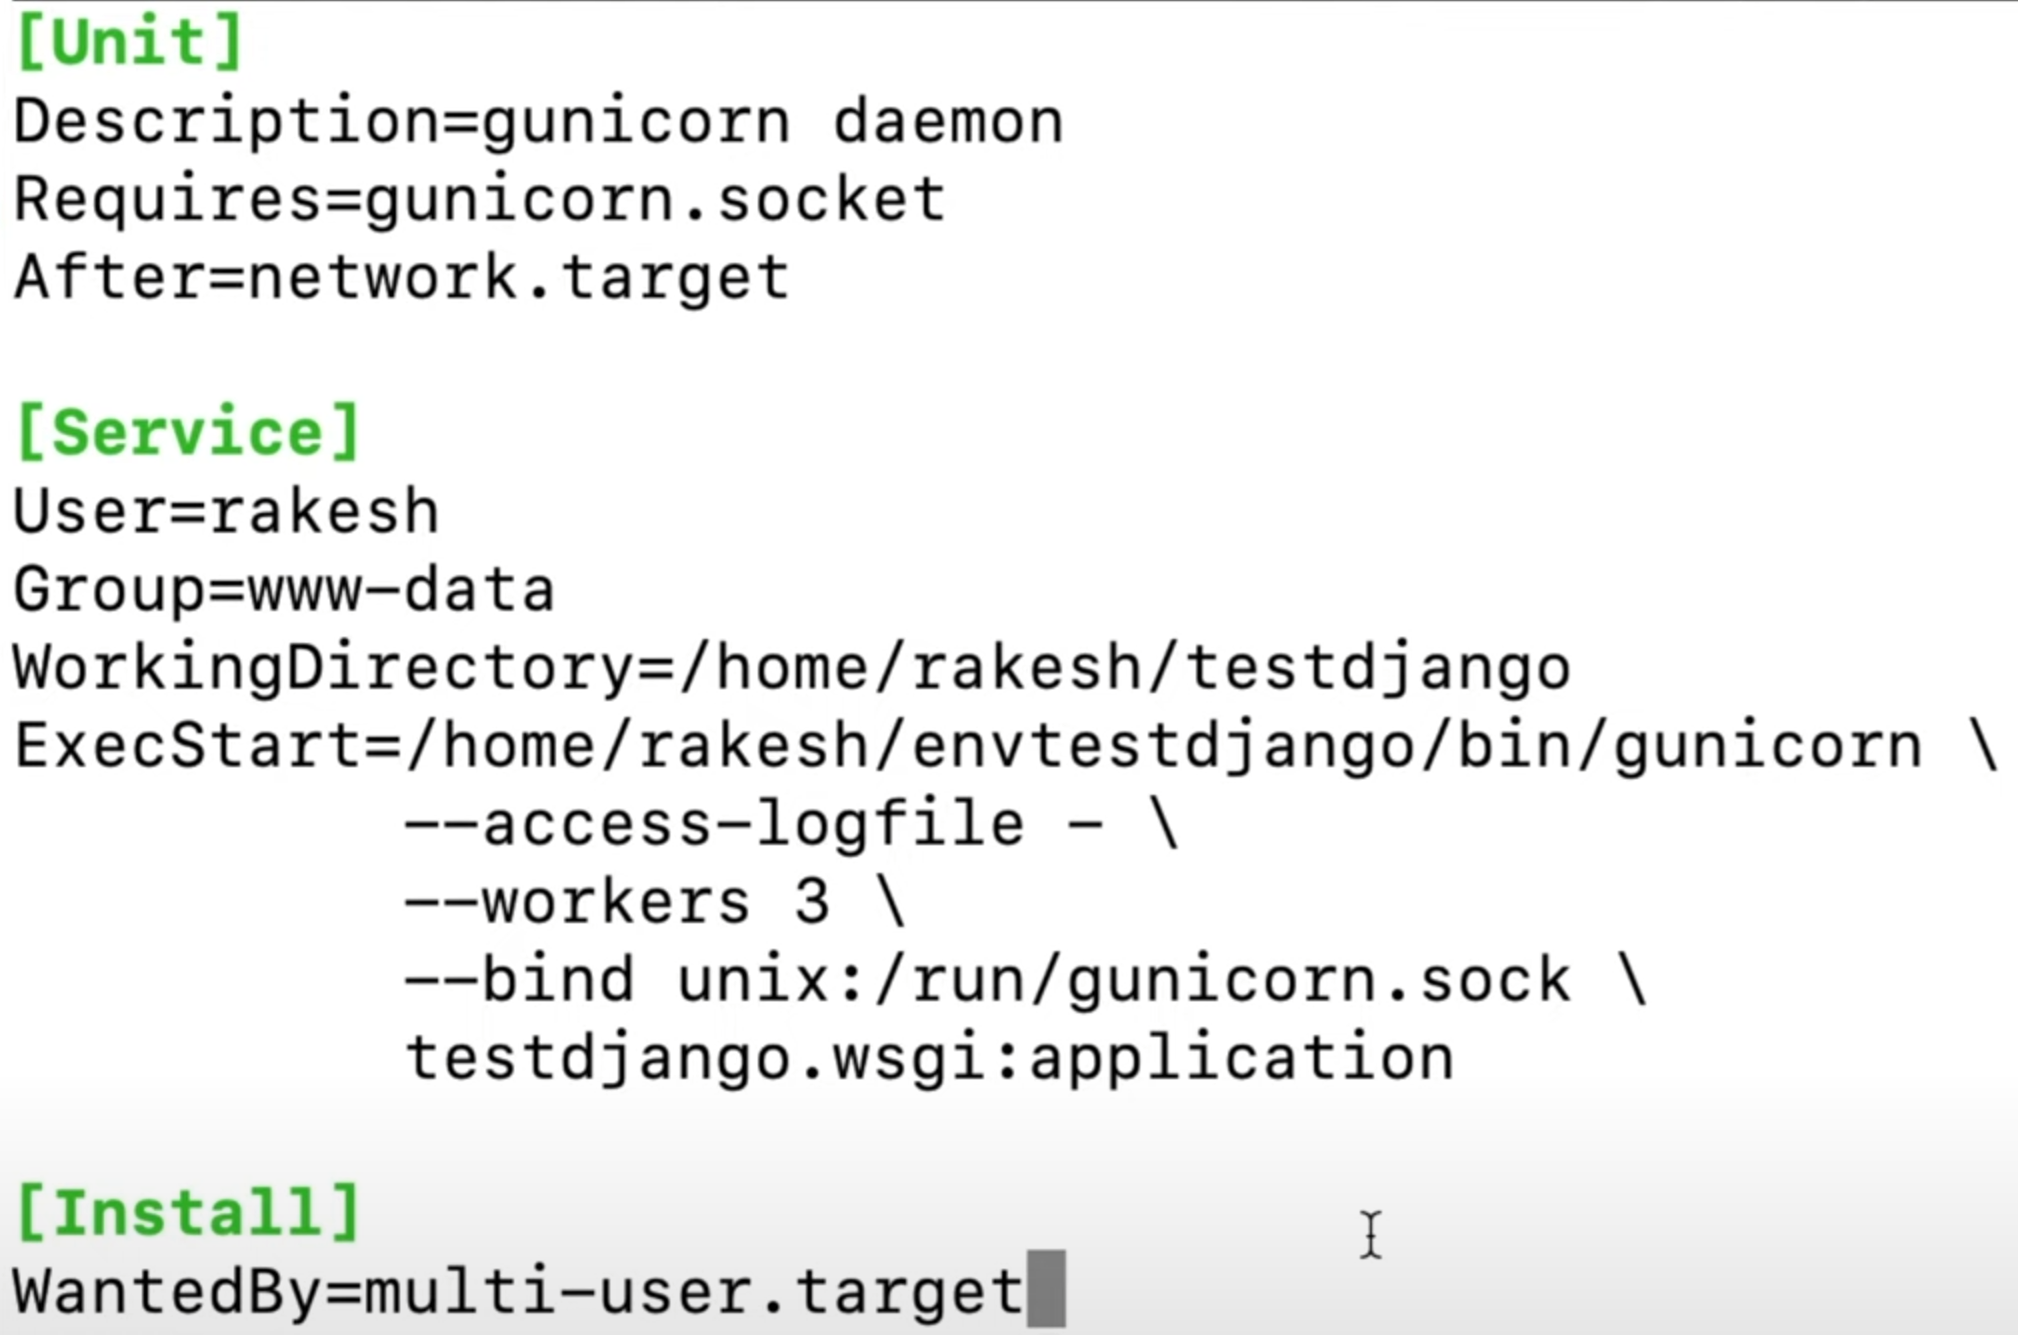
User - whoami 쳐서 나온 값 작성 (현재 접속자)
WorkingDirectory - manage.py 디렉토리 경로 (pwd로 확인)
ExecStart - gunicorn 파일이 venv/bin 안 경로 작성
wsgi.py 파일 있는 거 작성
conf.wsgi:application
나머지는 그대로 작성
6. gunicorn.socket 실행 및 활성화
sudo systemctl start gunicorn.socket
sudo systemctl enable gunicorn.socket
실패하면 실행되고 있는 8000 포트 끄기
7. gunicorn.sock 파일 생성되었는지 확인
file /run/gunicorn.sock
8. gunicorn.service 상태 확인
sudo systemctl status gunicorn.service
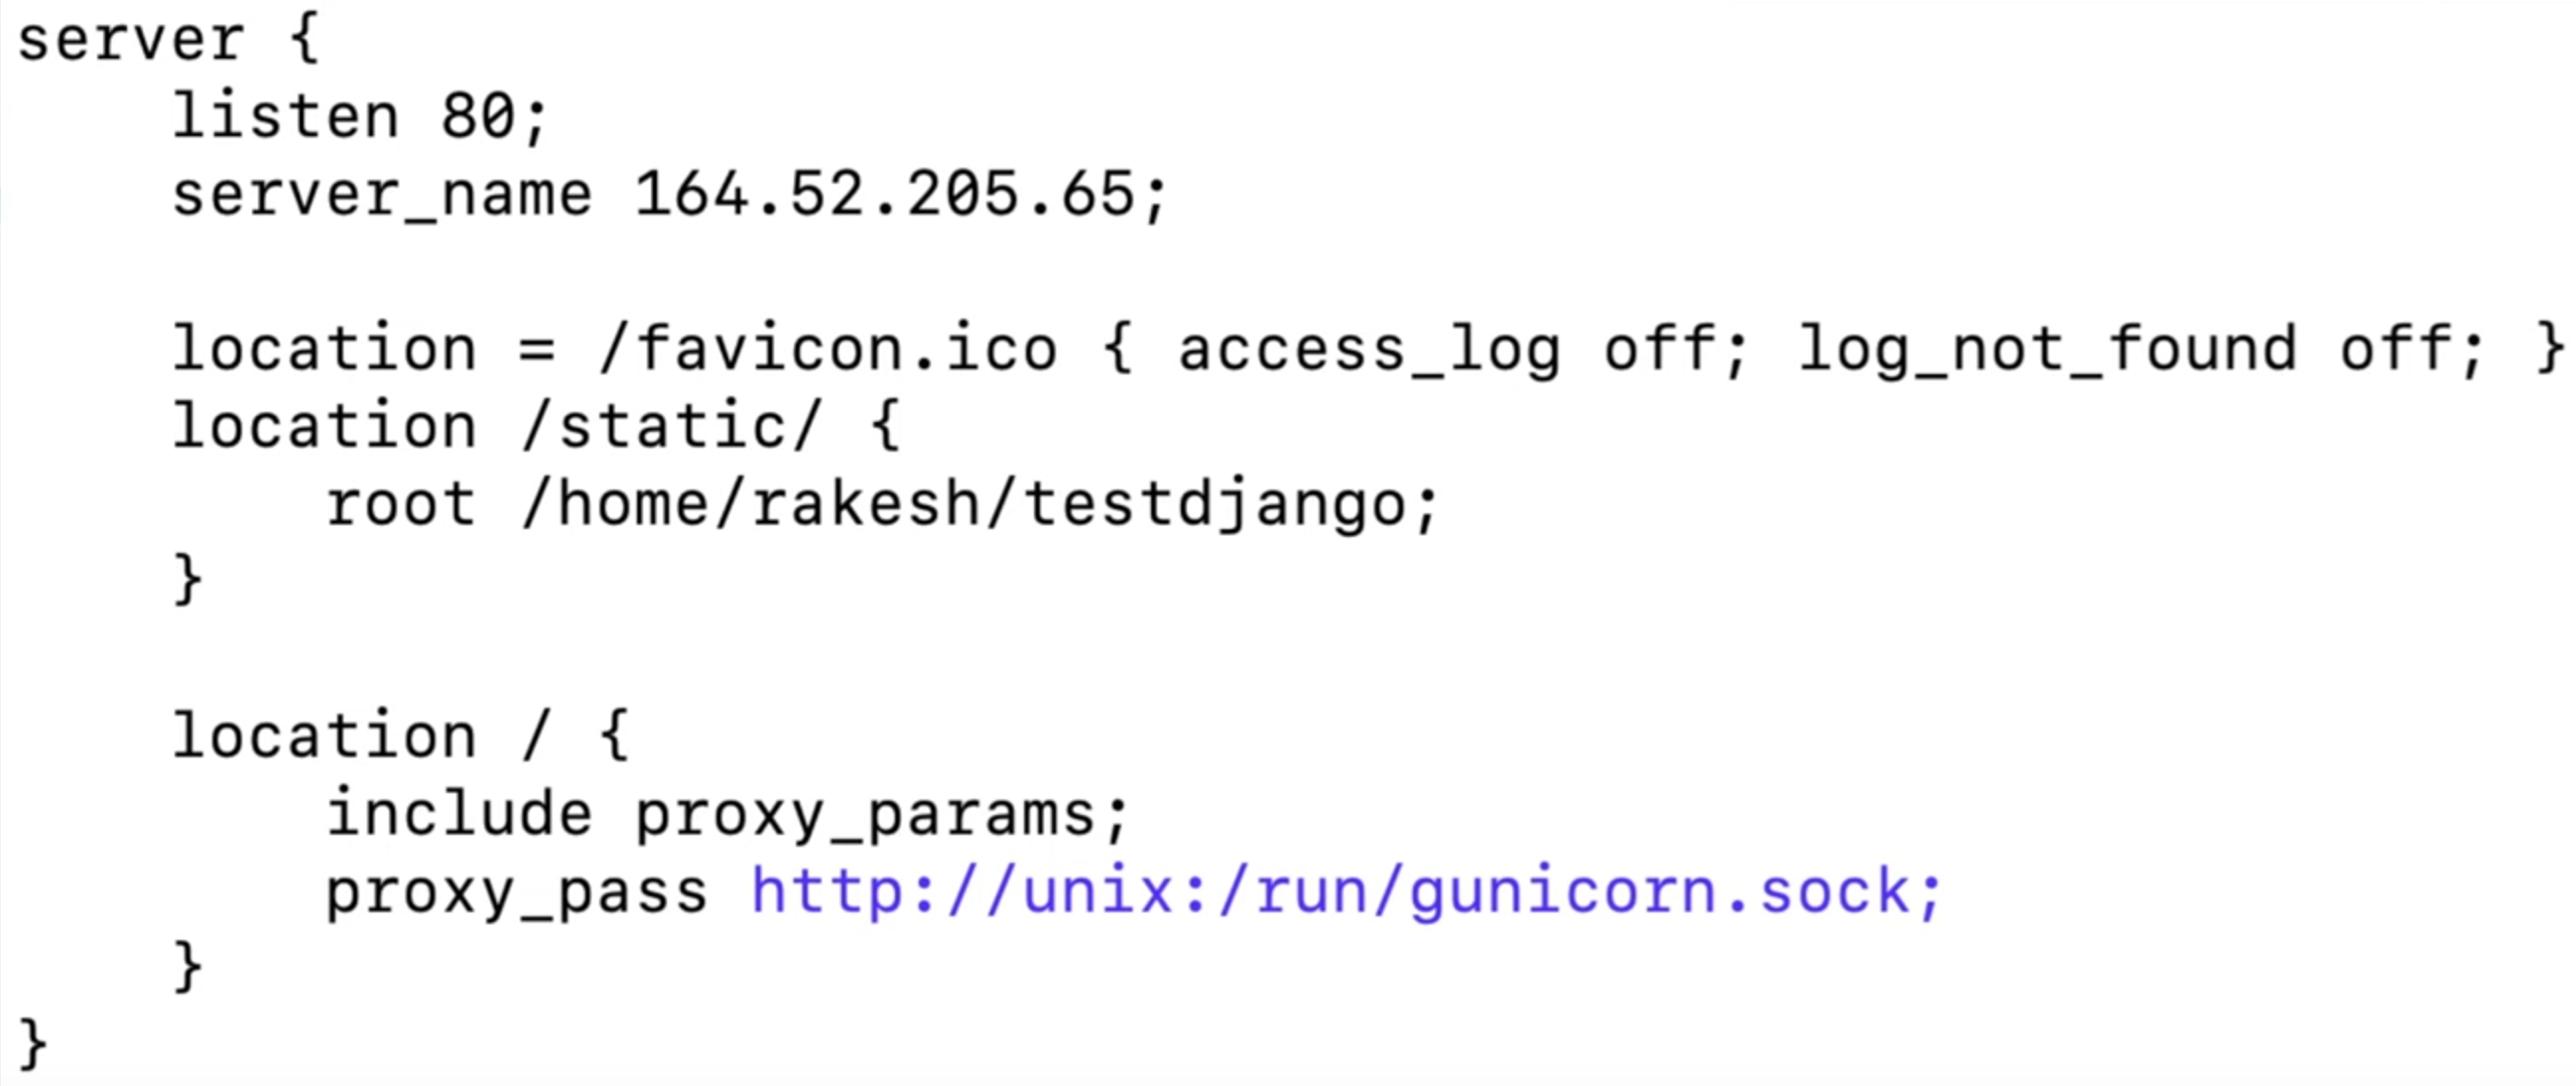
9. nginx 작성
sudo vim /etc/nginx/sites-available/apple
10. symbol link 복사
sudo ln -s /etc/nginx/sites-available/apple /etc/nginx/sites-enabled
11. nginx 통신 테스트
sudo nginx -t
12. nginx 재시작
sudo systemctl restart nginx
2024. 8. 14. 10:31

2024. 8. 13. 17:36

2024. 8. 11. 15:32
barbel.config.js
moduel.exports = {
presets: ['module:metro-react-native-babel-preset'],
plugins: ['react-native-reanimated/plugin']
}
npx react-native start --reset-cache
2024. 7. 23. 16:04
v-for Directive
Array of strings
Array of objects
Array of arrays
Block of HTML elements
Object key value pairs
2024. 7. 23. 15:42
v-text
v-html
v-bind:id
v-bind:class
v-bind:disabled
v-if
v-else
v-else-if
v-show
2024. 7. 19. 21:35
2024. 7. 18. 10:08
1. react-native-splash-screen 설치
npm i react-native-splash-image
2. 스플래시 스크린 이미지 설정
* Android: `android/app/src/main/res/drawable/splash.png'
* iOS: `LaunchScreen.storyboard` 파일을 수정하여 이미지를 추가
2024. 7. 11. 15:18
PyQt와 같은데 PyQt는 유료이고 PySide6은 무료이다
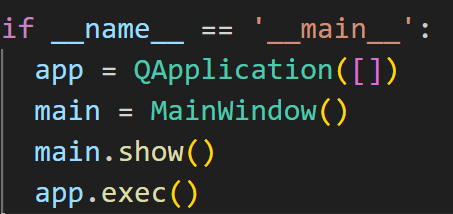
기본 구조
프레임 삭제(헤더 부분 틀 삭제)
화면 여러 개 보이기 (stack)
self.stack = QStackedWidget()
self.stack.addWidget(self.widget1)
self.stack.addWidget(self.widget2)
해당 stack 페이지로 이동
self.stack.setCurrentIndex(1)
2024. 7. 10. 09:14
1. PySide6 설치
pip install pyside6
2. Qt Designer 실행
pyside6-designer
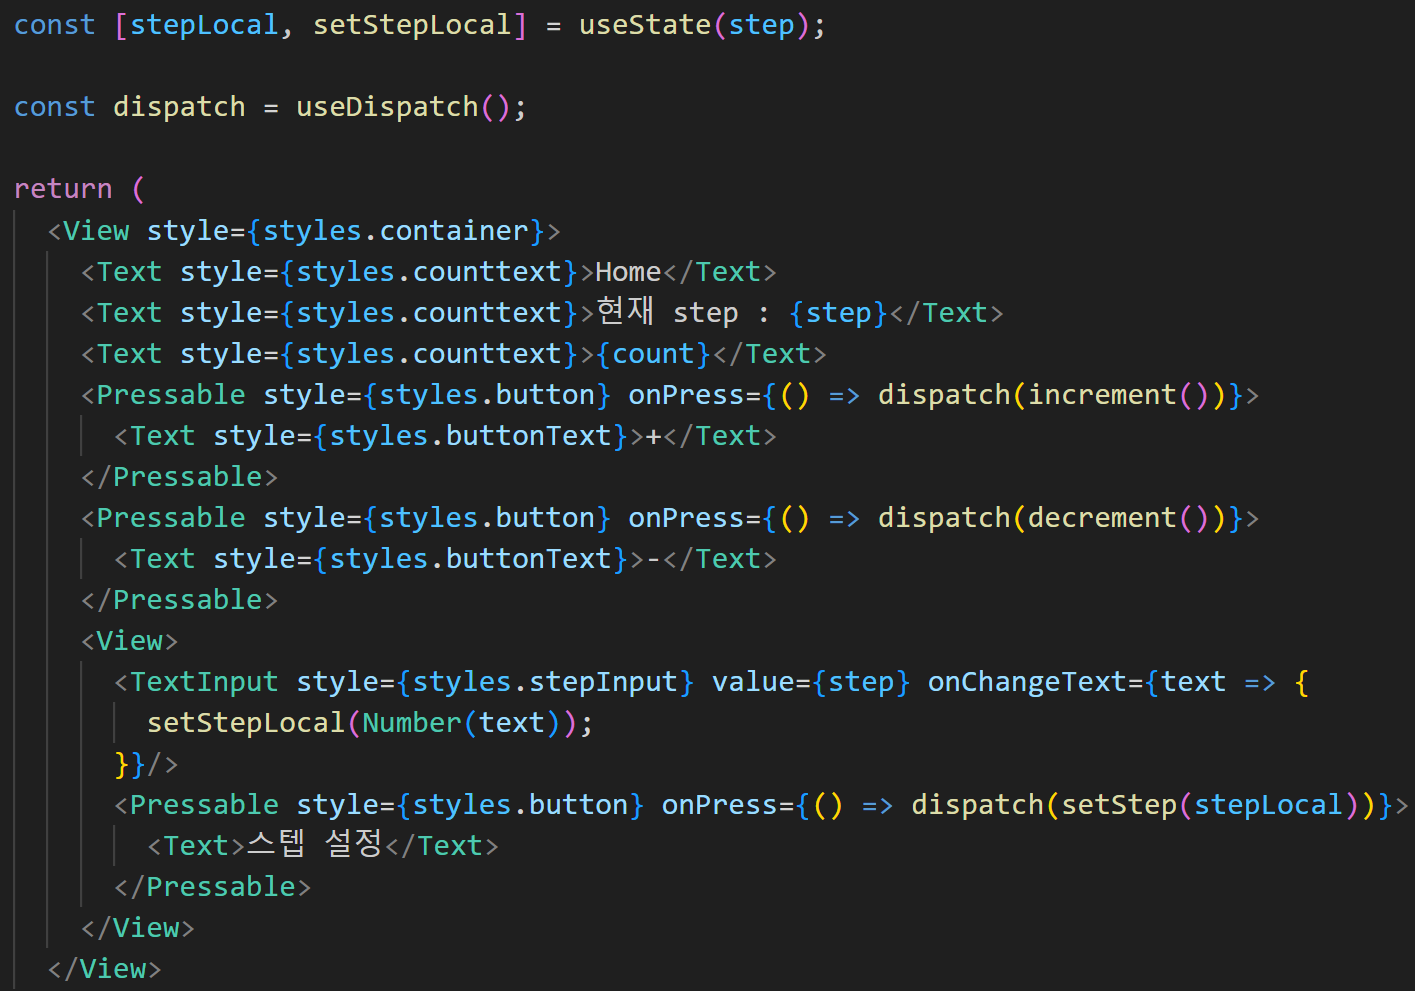
2024. 7. 2. 19:56
redux toolkit에서 사용하는 함수는 2개
1. configureStore
2. createSlice
설치 라이브러리
npm i redux
npm i react-redux
npm i @reduxjs/toolkit
1. store.js에 store 생성

2. Provider 생성 후 store 전달


3. slice 생성
- initialState 에 저장할 값 변수로 넣기
- store는 initialState에 있는 값
- store는 readonly 변수이기 때문에 변경하려면 reducer로 변경
- reducers 안에 reducer 함수 선언
- state는 initialState에 있는 값이고 변경 가능
- action은 type과 payload를 받는데 redux toolkit에서
payload가 reducer를 호출할 때 전달되는 파라미터 실제 값
- slice를 export 해서 store에서 import 해서 등록
- slice.actions 에서 reducer를 추출해서 export 해서
import 해서 dispatch를 이용해 호출

4. slice의 reducer를 store에 등록

5. useSelector를 이용해서 store에 있는 값 가져와서 사용

6. useDispatch를 이용해서 dispatch 함수를 호출해서 적용