검색결과 리스트
프로그래밍/JavaScript 에 해당되는 글 87건
- 2023.07.17 Composer 리눅스 설치
- 2023.07.11 페이지네이션
- 2023.07.04 JQueryMobile 기능 정리
- 2023.06.15 자바스크립트 엑셀 데이터 읽기
- 2023.05.02 데코레이터
- 2023.04.24 Uncaught TypeError
- 2023.04.07 Decorator 정의
- 2023.04.01 이미지 파일 올리기
- 2023.03.21 음원 코딩
- 2023.03.21 Paypal 결제 프로그래밍
- 2023.03.21 Web Audio API 동작 과정
- 2023.02.15 media screen 코드
- 2023.01.31 div 너비가 줄어들 때 확인 방법
- 2023.01.27 체크 버튼 누르면 input 비활성화 코드
- 2023.01.20 li 다음에 span 간격 벌어지는 이유
2023. 7. 17. 16:19
1. composer에 필요한 사항 설치
sudo apt update
sudo apt install wget php-cli php-zip unzip
2. composer-setup.php 다운로드
sudo wget -O composer-setup.php https://getcomposer.org/installer
3. composer 설치
sudo php composer-setup.php --install-dir=/usr/local/bin --filename=composer
4. composer 업데이트
sudo composer self-update
2023. 7. 11. 15:10
드디어 구현했다 직접 생각하고 계산해서 일주일 걸렸다
이게 말이 되나
설명하기도 어렵다
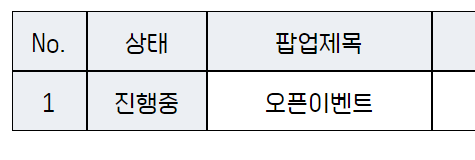
원래 데이터 아이템 list
데이터를 전체 불러왔다는 전제 하에 구현했다
일단 변수 선언

page : 현재 페이지를 가리키는 값이다 첫 번째 페이지는 1이다
buttonIndex : 버튼의 묶음 인덱스이다
contentNum : 데이터 전체 갯수 = copylist.length
maxContent : 한페이지에 보여지는 데이터 갯수
maxButton : 버튼 한 번 묶음으로 보여줄 때의 갯수이다
maxPage : 데이터 페이지 갯수이다 - 전체 데이터 갯수에서
한 페이지 보여주는 갯수로 나눔
maxBlock : 버튼 묶음 갯수이다 - 페이지 갯수가 버튼 갯수인데
이거를 버튼 한 번 묶음으로 나누면 됨
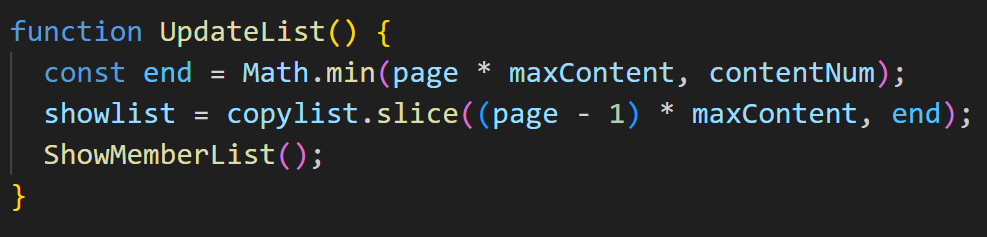
showlist : 현재 보여주는 글 목록
buttonlist : 현재 보여주는 버튼 목록
copylist : 전체를 선택했을 때 데이터를 원본으로 돌려야 하므로 복사본을 저장

처음에는 copylist 에 데이터를 넣는다
데이터 갯수를 구해서 contentNum 에 넣는다
그리고 그에 관련된 나머지 변수들을 계산한다 - ComputePage( );

buttonList 가 maxPage에 따라 변경되기 때문에 매번 계산해야 한다
계산하고 그려준다


각 버튼에 대한 기능은 다음과 같다


2023. 7. 4. 10:51
data-role="page" - 이 부분은 페이지
data-role="header" - 이 부분은 헤더
data-role="content" - 이 부분은 내용(가운데)
data-role="footer" - 이 부분은 푸터
data-role="button" - 버튼으로 설정
data-theme="a" - 테마 설정
data-transition="slide" - 페이지 이동을 슬라이드로
data-direction="reverse" - 페이지 이동할 때 반대방향으로 이동
data-fullscreen="true" - 박스를 전체화면으로 할 것인가
data-icon="back" - 아이콘 자동 설정
data-iconpos="notext" - 아이콘에 글씨 삭제
data-position="fixed" - 박스 고정(헤더, 푸터)
data-role="navbar" - 네비게이션 메뉴로 설정 (ul + li)
data-role="listview" - 리스트뷰로 설정(ul + li)
data-inset="true" - 마진 주어서 여백 설정
Fotorama 옵션 (www.fotorama.io)
data-width="100%" - 박스 너비 설정
data-arrows="true" - 박스에 화살표 붙일 것인가
data-nav="thumbs" - 아래에 사진 박스 붙일 것인가
data-ratio="1920/1080" - 이미지 비율
data-arrowfullscreen - 전체화면 표시 여부
data-caption="lake" - 이미지 설명 문구 설정
2023. 6. 15. 17:10
1. Excel 사용할 스크립트 추가

2. 파일 입력 창 추가

3. 데이터 저장 변수 선언

4. Excel 읽는 함수 선언

5. 변수 사용해서 출력

2023. 5. 2. 16:46
데코레이터는 클래스, 메서드, 속성, 매개변수, 접근자(get, set) 에
추가할 수 있는 특수한 문법
@데코레이터명
데코레이터가 적용된 클래스, 메서드, 속성, 매개변수의 정보를 읽어서
동작을 변경
메타 - 프로그래밍을 지원하는 기능
여러 개의 클래스 또는 메서드에 같은 패턴의 코드가 나오는 경우
데코레이터를 사용하면 좋음
타입스크립트에서 데코레이터 사용하려면
tsconfig.json에서 "experimentalDecorators": true 로 설정

2023. 4. 24. 22:59

이렇게 코드를 작성했을 때 다음과 같은 에러가 발생한다
Uncaught TypeError: Cannot set properties of null (setting 'onmousedown')
발생하는 이유는 hat 이 null 이기 때문이다
script 태그를 header에 넣은 경우 body의 태그가
생성되기 전에 querySelector로 접근하기 때문이다
첫 번째 방법은 script 태그를 body 태그 아래에 두면
태그가 다 실행되어 생성된 다음에 script 코드가 생성되어 객체가
정상적으로 생성된다
두 번째 방법은 window.onload 안에 넣으면 된다

2023. 4. 7. 16:59
Decorator (장식자)는 클래스 프로퍼티나 메소드 혹은 클래스 자체를
수정하는데 사용되는 자바스크립트 함수
문법은 @decoratorFunc 과 같으며 클래스 프로퍼티, 메소드,
클래스 바로 윗줄에 추가
Decorator는 Decorator가 적용된 메소드가 호출되거나 클래스 인스턴스가
만들어지는 등 런타임에 실행
Chaining 형식으로 사용 가능
@과 함께 함수가 호출되는 경우 받게 되는 파라미터
target: 속성을 정의하고자 하는 객체
name: 속성의 이름
descriptor: 새로 정의하고자 하는 속성에 대한 설명
2023. 4. 1. 20:40

2023. 3. 21. 19:29
// create an AudioContext
const AudioContext = window.AudioContext || window.webkitAudioContext;
const audioContext = new AudioContext();
// load the MP3 file
const url = 'example.mp3';
const request = new XMLHttpRequest();
request.open('GET', url, true);
request.responseType = 'arraybuffer';
request.onload = function() {
// decode the audio data
audioContext.decodeAudioData(request.response, function(buffer) {
// create a source node
const source = audioContext.createBufferSource();
source.buffer = buffer;
// create a stereo panner node
const panner = audioContext.createStereoPanner();
panner.pan.value = 0; // center position
// connect the nodes
source.connect(panner);
panner.connect(audioContext.destination);
// start the playback
source.start();
});
};
request.send();
2023. 3. 21. 19:27
// Replace with your own PayPal merchant ID
const merchantID = "YOUR_MERCHANT_ID";
// Replace with the total price of the items being purchased
const totalPrice = 100;
// Render the PayPal button
paypal.Buttons({
createOrder: function(data, actions) {
// Set up the transaction details
return actions.order.create({
purchase_units: [{
amount: {
value: totalPrice.toFixed(2) // Format price to two decimal places
}
}]
});
},
onApprove: function(data, actions) {
// Capture the funds from the transaction
return actions.order.capture().then(function(details) {
// Show a success message to the buyer
alert("Transaction completed by " + details.payer.name.given_name + "!");
});
}
}).render("#paypal-button-container");
2023. 3. 21. 09:41
Web Audio API
- 자바스크립트로 오디오 소스에 다양한 변화를 줄 수 있는 시스템
- 음원 로딩, 재생, 정지, 패닝, 디스토션, 딜레이 등 여러가지 음향 효과
- 파형 막대를 그리는 등 데이터의 시각화도 가능
- AudioContext 객체를 생성하면서 시작
- AudioContext 객체는 내부에 여러 개의 Audio Node 들을 가질 수 있음
- Audio Node 들은 각각 하나의 역할을 수행하는 모듈들
- GainNode는 음원의 볼륨 크기를 조절
- PannerNode는 음원에 패닝 효과를 적용하고 조절
- AnalyserNode는 음원으로부터 데이터를 추출
- AudioContext 안에 있는 노드들은 서로 연결되어
하나의 연결된 그래프(Audio routing graph)를 형성
Web Audio API 흐름
1. AudioContext 객체 생성
const audio = new AudioContext();
const audio = new (window.AudioContext() || window.webkitAudioContext)();
2. AudioContext 내부에 오디오 소스를 생성
오디오 소스 - <audio> 태그, Oscillator, Raw PCM 데이터, 실시간 Stream
<audio id="audio-source" src="./src/audio.mp3"/>
const audioSource = document.querySelector('#audio-source');
const source = audio.createMediaElementSource(audioSource);
3. 게인, 패너, 리버브, 컴프레서 등 여러가지 이펙터 노드들 생성
const gainNode = audio.createGain();
4. 오디오의 최종 목적지(destination) 정함 - 노트북 스피커 등
5. 소스 -> 이펙터 노드 -> 목적지 순서대로 연결
const gainConnected = source.connect(gainNode);
gainConnected.connect(audio.destination);
https://curryyou.tistory.com/451
2023. 2. 15. 11:31
480px 이하로 내려가면 다음 CSS 코드 적용
@media screen and (max-width: 480px) {
}
2023. 1. 31. 16:09
display: flex를 이용하여 박스 표를 만들었을 때
Item 을 가로로 계속 추가하면 안의 콘텐츠 영역이 꽉 찰 때까지
div box를 계속 끼워 넣어서 div box 크기가 줄어든다
width가 줄어들지 않게 하는 방법은
item 요소에
flex-shrink: 0;
을 넣으면 div box 의 width가 유지되면서 오른쪽에 계속 추가된다
2023. 1. 27. 11:38

2023. 1. 20. 11:47

위와 같은 코드에서 다음과 같이 표를 만들면 간격이 벌어진다

그 이유는 span 을 다음줄로 내려서 그 사이의 공백이 보이는 것이다
이를 해결하기 위해 span의 부모 태그의 font-size를 0px 로 주면 해결된다

그리고 다시 자신의 span 태그의 font-size를 원래 크기로 설정해준다